瞭解新版的 UI 元件,例如可編輯的文字欄位、圓形按鈕,以及為小費計算器應用程式建立版面配置的切換按鈕。你將會使用 XML,而不使用 Android Studio 中的版面配置編輯器,來編輯應用程式的版面配置。
學習目標
- 如何在 Android 中讀取及寫入 XML 版面配置
- 如何建構簡易表單,用於使用者文字輸入和選項
啟動專案
使用 Android 應用程式建立簡易的計算機簡易版。
完成後小費計算機應用程式會如下所示:
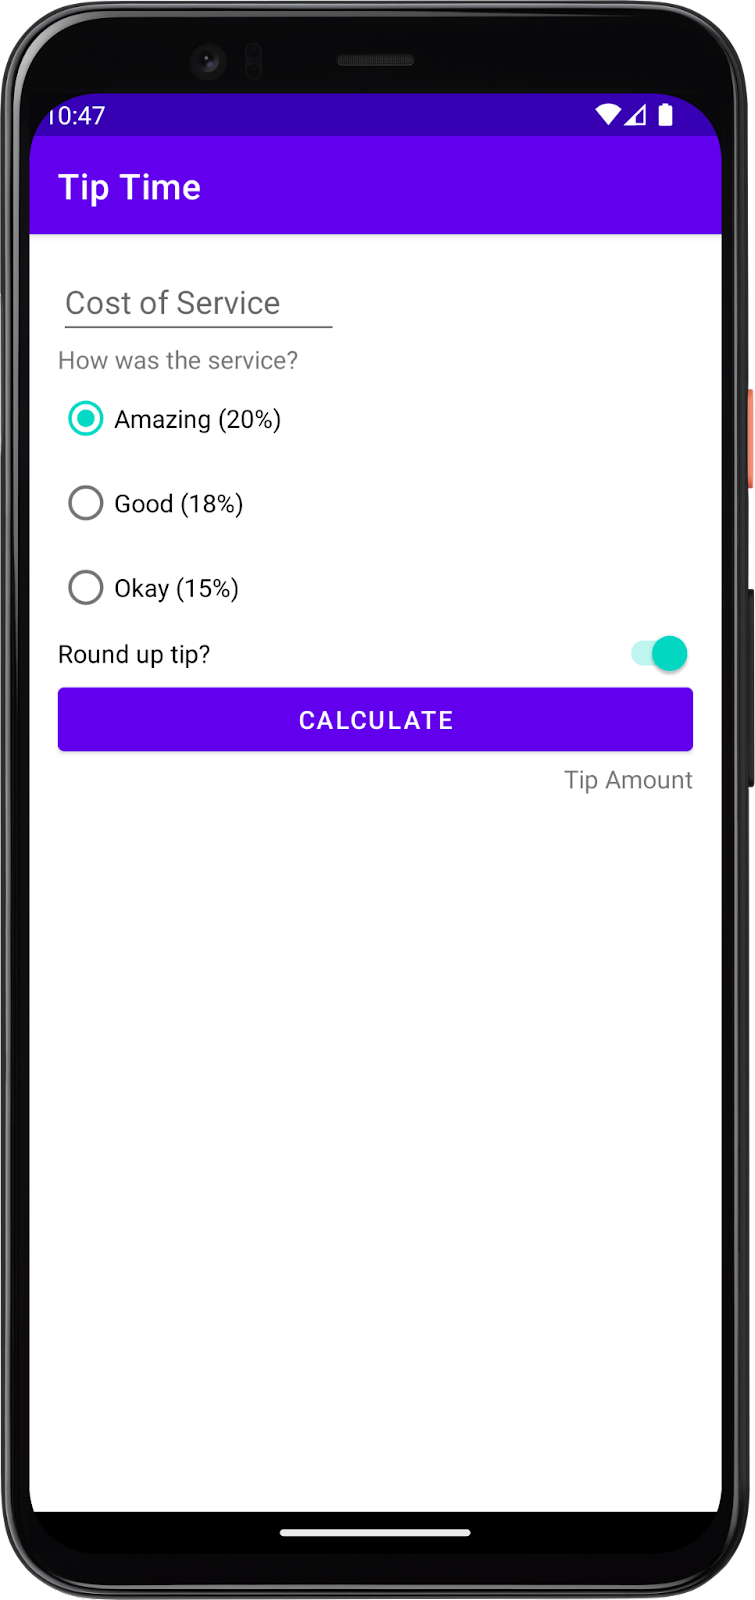
您需要使用 Android 提供的下列 UI 元素:
EditText- 用於輸入及傳送訊息TextView- 顯示服務條款和小費金額等文字RadioButton:每個小費選項的可選取圓形按鈕RadioGroup- 將圓形按鈕選項分組Switch- 開啟/關閉切換按鈕,選擇是否將小費四捨五入
建立一個空白活動專案
- 首先,在 Android Studio 中使用 空白活動 範本來建立新品的 Kotlin 專案。
- 呼叫應用程式「Tip Time」,最低 API 級別為 19 (KitKat)。套件名稱為 com.example.tiptime。
閱讀及瞭解 XML
如果不想使用自己熟悉的版面配置編輯器,您可以修改描述使用者介面的 XML 來建構應用程式的版面配置。瞭解使用 XML 瞭解及修改 UI 版面配置對 Android 開發人員的重要性。
您將會查看並編輯 XML 檔案,為這個應用程式定義 UI 版面配置。XML 是可延伸標記語言的一種,這是一種利用文字文件來描述資料的方式。由於 XML 是可擴充且極具彈性的功能,所以有許多種不同的用途,包括定義 Android 應用程式的 UI 版面配置。您或許可以在先前的程式碼研究室中回想起,「strings.xml」這個 XML 檔案中的其他資源也定義了其他資源。
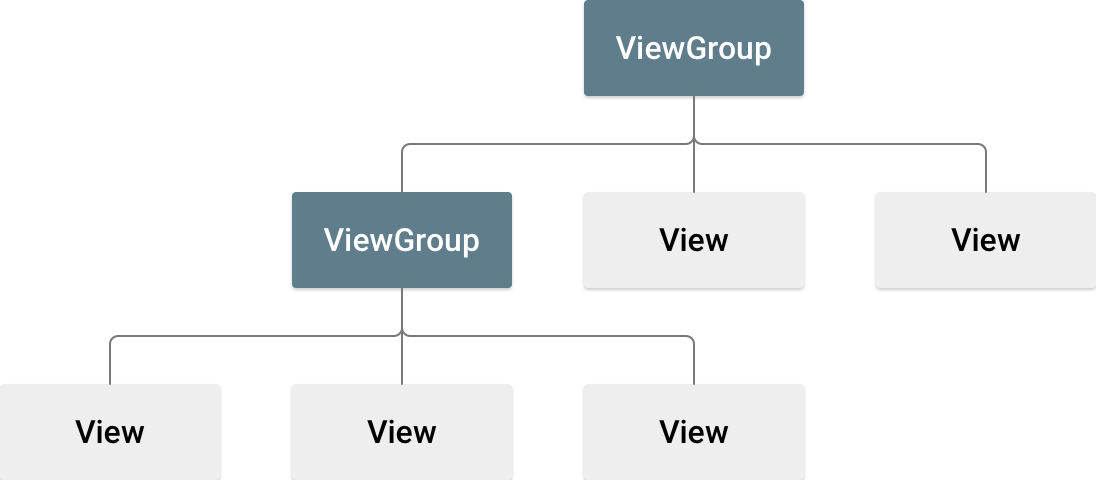
Android 應用程式的使用者介面是由元件(小工具)的元件階層組成,以及這些元件的螢幕版面配置。請注意,這些版面配置本身是 UI 元件。
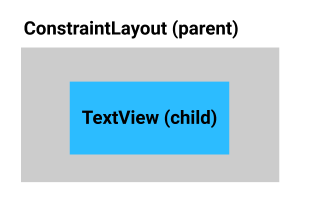
您必須說明畫面上的 UI 元素檢視畫面階層。舉例來說,ConstraintLayout (父項) 可包含 Buttons、TextViews、ImageViews 或其他檢視畫面 (子項)。請注意,ConstraintLayout是 ViewGroup 的子類別。可讓您靈活設定子項的位置或調整大小。
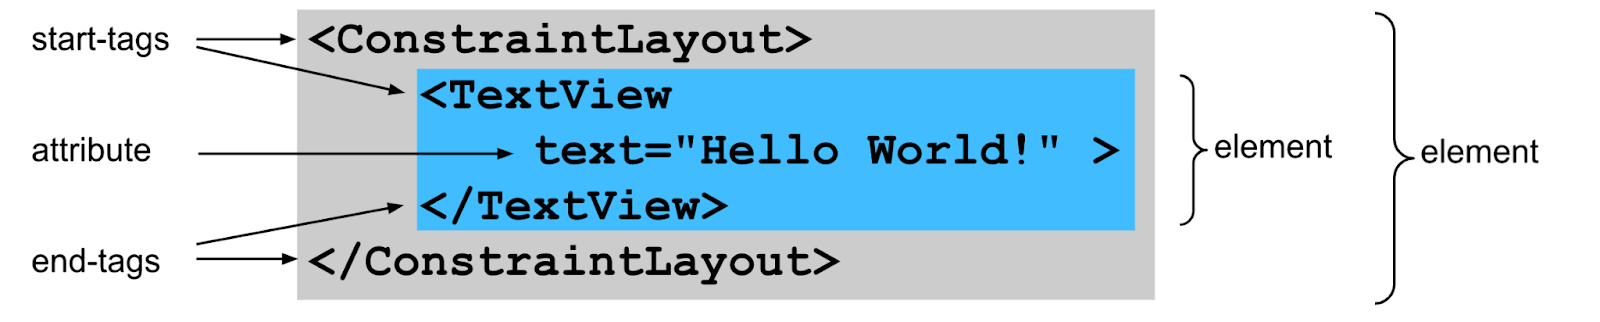
每個 UI 元素都會在 XML 檔案中以 XML 元素出現。每個元素的開頭和結尾都是代碼,而每個標記的開頭都是 <,結尾則是 >。就像是您可以使用版面配置編輯器 (設計) 設定 UI 元素的屬性,XML 元素也可以具有「屬性」。簡單來說,上述 UI 元素的 XML 可能如下所示:
1 | <ConstraintLayout> |
以下是一個實際範例。
- 開啟
activity_main.xml(「app」>「res」>「layout」>「activity_main.xml」) - 您可能會注意到應用程式顯示包含「Hello World!」的
TextView。如ConstraintLayout中所述,您在使用這個範本建立的先前的專案中看過。 - 在版面配置編輯器的右上方,找到「Code」、「Split」和「Design」檢視畫面的選項。
- 選取「Code」檢視。

activity_main.xml 中的 XML 如下所示:
1 |
|
- 請注意縮排。Android Studio 會自動執行上述作業,顯示元素階層。
TextView已縮排,因為ConstraintLayout裡包含這個項目。ConstraintLayout是父項,TextView是子節點。每個元素的屬性會以縮排的方式顯示,表示該元素屬於該元素的一部分。 - 請注意色彩編碼:檔案的類似部分會繪製成同一顏色,方便您比對。請特別注意,Android Studio 會繪製用相同顏色元素的開始和結尾。
XML 標記、元素和屬性
以下是 TextView 元素的簡化版本,方便您查看部分重要部分:
1 | <TextView |
包含 <TextView 的行則是標記的開頭,而 /> 行則是標記結尾。標有 android:text="Hello World!" 的行是標記的屬性。這代表 TextView 將要顯示的文字。這 3 行是常用的元素 (又稱為空白元素代碼),也就是說,如果您利用獨立的「start-tag」和「end-tag」編寫程式碼,例如:
1 | <TextView |
另一個常見的例子是空白元素標記,編寫時盡可能減少這類標記的行數,然後將代碼的結尾與行前的行結合。因此,您可能會在兩行中看到空白元素標記 (沒有屬性的話,甚至只有一行):
1 | <!-- with attributes, two lines --> |
由於 ConstraintLayout 元素是以獨立開始和結束標記寫成,因此必須含有其他元素。以下是含有 TextView 元素的 ConstraintLayout 元素簡化版本:
1 | <androidx.constraintlayout.widget.ConstraintLayout> |
如要將另一個 View 新增為 ConstraintLayout 的子項 (例如 TextView 下的 Button),其會在 TextView 標記 /> 的結尾,並且在 ConstraintLayout 的結尾標記之前,如下所示:
1 | <androidx.constraintlayout.widget.ConstraintLayout> |
進一步瞭解版面配置的 XML
查看
ConstraintLayout的標記,您會發現這顯示為androidx.constraintlayout.widget.ConstraintLayout,而非和TextView一樣只有ConstraintLayout。這是因為ConstraintLayout是 Android Jetpack 的一部分,而其中的程式碼程式庫在 Android 核心平台之外提供了額外功能。Jetpack 提供了一些實用功能,可協助您輕鬆建構應用程式。您會發現此 UI 元件因為是以「androidx」開頭,所以屬於 Jetpack 的一部分。您可能會發現開頭為
xmlns: 的行數,後接android、app和tools。
1 | xmlns:android="http://schemas.android.com/apk/res/android" |
xmlns 代表 XML 命名空間,而每一行分別定義一個「結構定義」或相關詞彙。舉例來說,android: 命名空間會標示 Android 系統定義的屬性。版面配置 XML 中的所有屬性都是從其中一個命名空間開始執行。
XML 元素之間的空白字元不會對電腦產生意義,但可讓 XML 更易於閱讀。
您可以對 XML 新增註解,就跟使用 Kotlin 程式碼一樣。開頭是
<!--,結尾是-->。
1 | <!-- this is a comment in XML --> |
- 請注意檔案的第一行:
1 |
用於表示檔案是 XML 檔案,但並非所有 XML 檔案都會包含這類檔案。
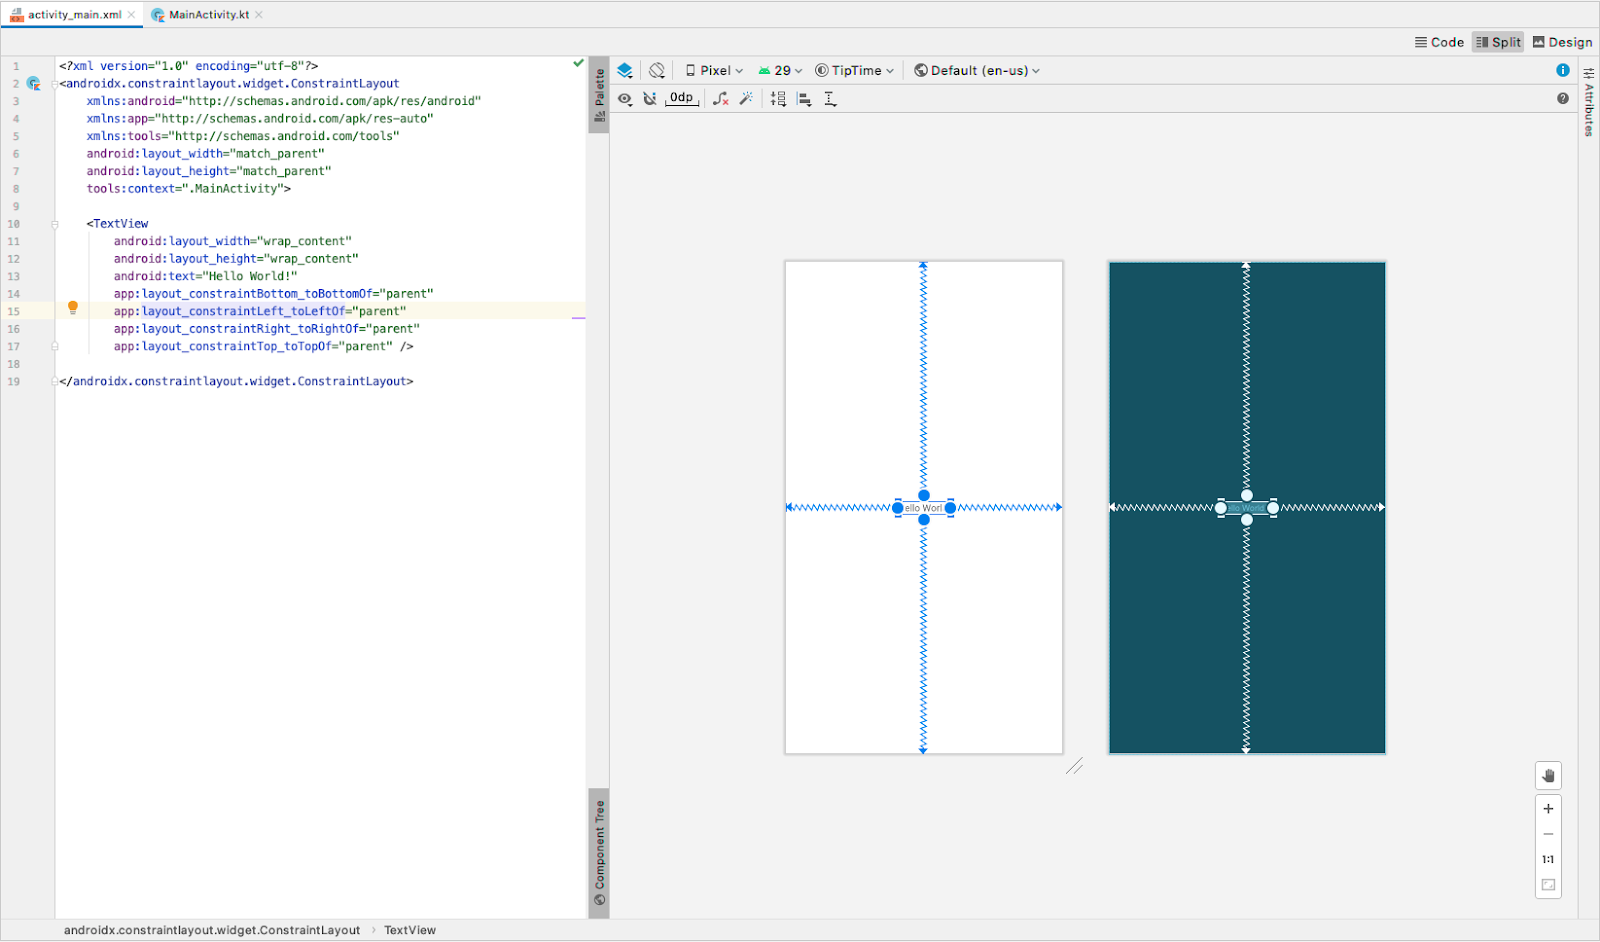
在 XML 中建立版面配置
- 在
activity_main.xml中,請切換至「Split」 畫面,即可查看 設計編輯器 旁的 XML。「設計編輯器」可讓您預覽 UI 版面配置。

- 請嘗試點選其他行 (
ConstraintLayout下和TextView下一行),然後可注意到會選取到「Design Editor」中對應的畫面。反之亦然。舉例來說,如果您在「Design Editor」中按一下TextView,系統就會醒目顯示對應的 XML。
刪除 TextView
您現在不需要
TextView,請將其刪除。請務必從<TextView至/>結尾全部刪除。在
ConstraintLayout中加入16dp邊框間距,避免 UI 與螢幕邊緣過度擁擠。
1 | <androidx.constraintlayout.widget.ConstraintLayout |
新增服務費用文字欄位
在這個步驟中,您必須新增 UI 元素,才能在應用程式中輸入服務費用。您必須使用 EditText 元素,讓使用者在應用程式中輸入或修改文字。
目前的版面配置檔案應該會如下所示:
1 |
|
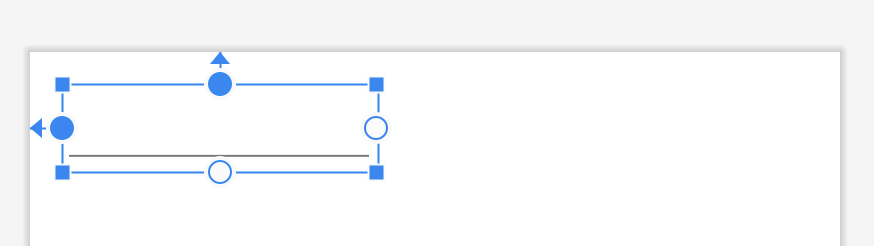
請注意,
EditText會加上紅色底線。將滑鼠游標移到指標上,系統就會顯示「檢視畫面不受限」的錯誤訊息,您對在舊版程式碼研究室中的這類程式碼應該十分熟悉。先前提過,
ConstraintLayout的子項設有限制,因此版面配置會熟悉該如何排列。

- 將這些限制新增至
EditText可固定在父項的左上角。
1 | app:layout_constraintStart_toStartOf="parent" |
加入新限制條件後,EditText 元素會如下所示:
1 | <EditText |
查看編輯文字屬性
請仔細檢查您貼上的所有 EditText 屬性,確保它們與您應用程式中的方式搭配運作。
- 找出設為
@+id/plain_text_input的id屬性。 - 將
id屬性變更為較為適當的名稱@+id/cost_of_service。
查看
layout_height屬性。已設為wrap_content,表示高度會和當中的內容高度相同。沒關係,因為只有 1 行文字。查看
layout_width屬性。已設為match_parent,但你無法在ConstraintLayout的子項中設定match_parent。此外,文字欄位不需要那麼寬。設為160dp的固定寬度,但應預留足夠空間,讓使用者輸入服務費用。
- 找到新的
inputType屬性,這是一項新功能。屬性值為"text",表示使用者可在畫面上的欄位中輸入任何文字字元 (英數字元、符號等)。
1 | android:inputType="text" |
不過,假如您只想在 EditText 中輸入數字,因為該欄位代表貨幣金額。
- 清除
text字詞,但保留引號。 - 輸入
number的位置。輸入「n」後,Android Studio 會顯示包含「n」的可能完成項目清單。

- 選擇
numberDecimal,這個類型可限制只顯示含小數點的數字。
1 | android:inputType="numberDecimal" |
如要查看輸入類型的其他選項,請參閱開發人員說明文件中的 指定輸入法類型。
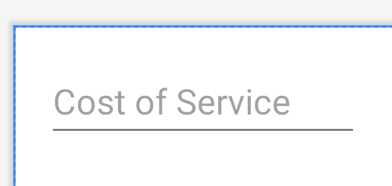
- 在
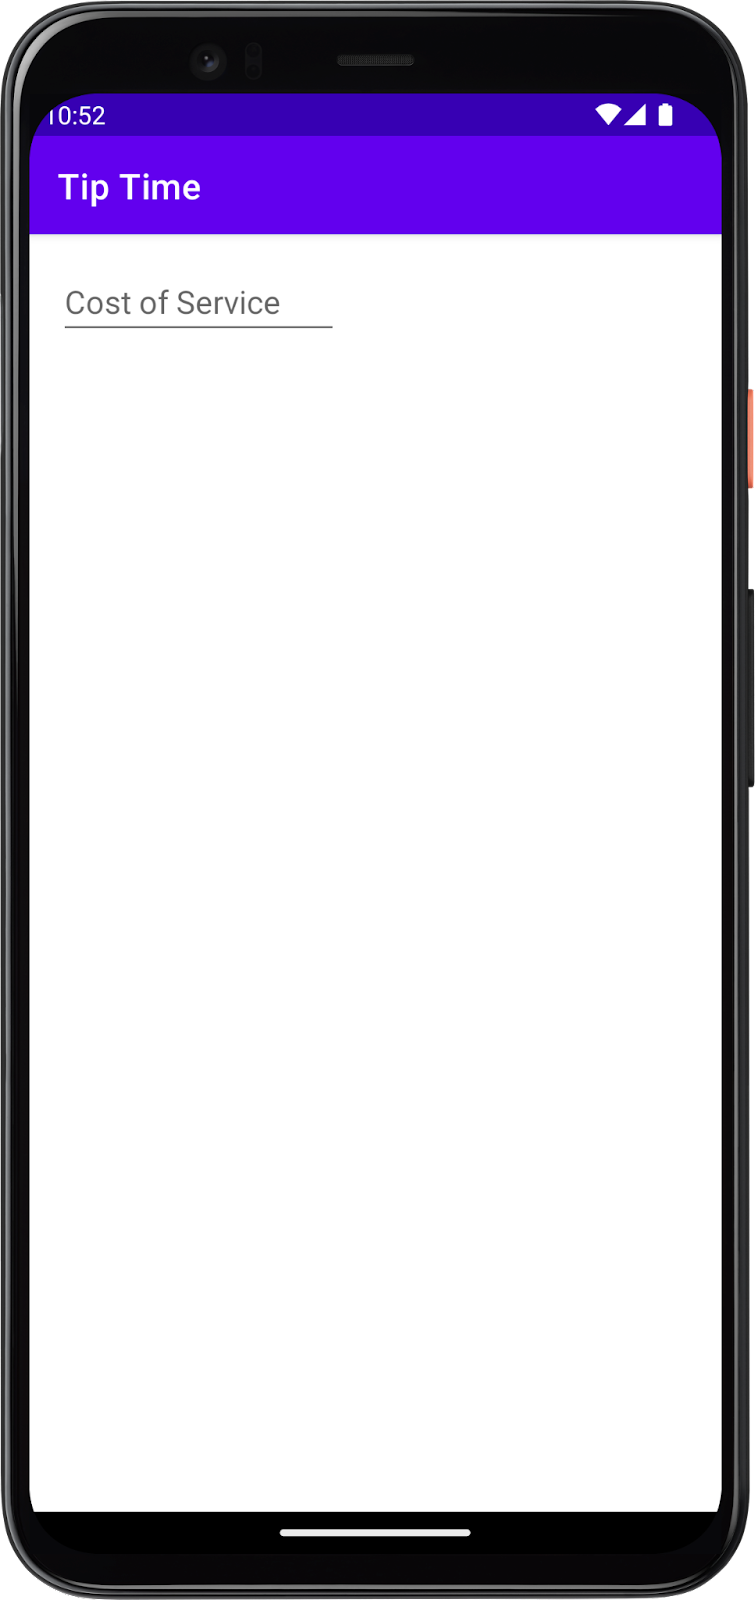
EditText中加入hint屬性,藉此說明使用者應在欄位中輸入的內容。
1 | android:hint="Cost of Service" |
您也會看到「Design Editor」將其更新。
- 在模擬器中執行應用程式。看起來應該像這樣:
新增服務問題
在這個步驟中,您必須新增 TextView 問題說明:”How was the service?”請嘗試輸入,不要複製/貼上。你可以透過 Android Studio 提供建議的做法。
- 關閉
EditText標記/>後,新增一行然後開始輸入<TextView - 從建議中選取
TextView,Android Studio 就會自動為TextView新增layout_width和layout_height屬性。 - 請為這兩個屬性選擇
wrap_content,因為TextView只需要與當中的文字內容一樣大。 - 新增含有
"How was the service?"的text屬性 - 使用
/>關閉標記。 - 請注意,在「Design Editor」中
TextView會與EditText重疊。
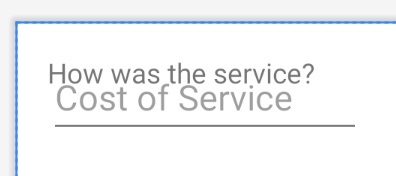
垂直部分 TextView 應低於服務費用文字欄位。水平部分要讓 TextView 對齊父項的邊緣。
- 為
TextView加上水平限制,限制它的起點到父項的起點。
1 | app:layout_constraintStart_toStartOf="parent" |
- 在
TextView中加入垂直限制,將TextView的上緣限制在服務費用View的底部邊緣。
1 | app:layout_constraintTop_toBottomOf="@id/cost_of_service" |
- 在
TextView新增資源 ID。您稍後必須參考這個資料檢視,因為我們建議您新增更多檢視點,並將這些項目互相衝突。
1 | android:id="@+id/service_question" |
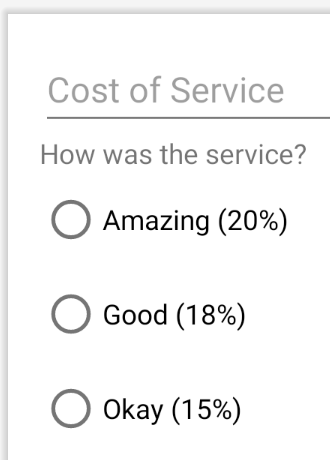
新增提示選項
接下來,您需要為各個使用者選項提供圓形按鈕(RadioButton)選項。
共有三個選項:
- 極佳 (20%)
- 不錯 (18%)
- 一般 (15%)
- 瀏覽圓形按鈕(RadioButton)指南,瞭解
RadioGroup是父項,以及RadioButtons是子項。
- 返回 Android Studio 中的版面配置,將
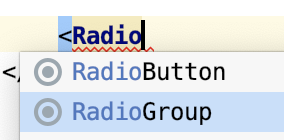
RadioGroup和RadioButton新增至應用程式。 - 在
TextView元素之後,仍顯示在ConstraintLayout中,開始輸入<RadioGroup。
- 將
RadioGroup的layout_width和layout_height設為wrap_content。 - 新增設為
@+id/tip_options的資源 ID。 - 使用
>關閉起始標記。 - Android Studio 會加上
</RadioGroup>。和ConstraintLayout一樣,RadioGroup元素內部也會包含其他元素,因此建議您將元素移到單獨的線條。

- 將
RadioGroup限制在服務問題下方 (垂直),並限制父項的開頭 (水平)。 - 將
android:orientation屬性設為vertical。如要指定某列的RadioButtons,可以將方向設為horizontal。
新增圓形按鈕
- 在
RadioGroup的最後一個屬性後方,在</RadioGroup>結束標記之前加上RadioButton。
1 | <RadioGroup |
- 將
layout_width和layout_height設為wrap_content。 - 將
@+id/option_twenty_percent的資源 ID 指派給RadioButton。 - 將文字設為
Amazing (20%)。 - 使用
/>關閉標記。
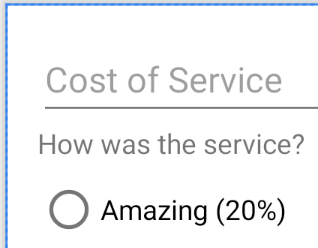
接著為 Good (18%) 和 Okay (15%) 選項新增 2 個圓形按鈕(RadioButton)。
以下是新增完成的XML:
1 | <RadioGroup |
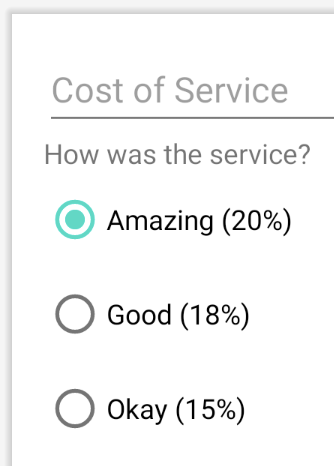
新增預設選項
目前未選取任何提示選項。系統預設會選取其中一個圓形按鈕選項。RadioGroup 上有一個屬性可讓您指定要先檢查哪一個按鈕。名稱是 checkedButton,並設為所選圓形按鈕的按鈕資源。
- 在
RadioGroup上,將android:checkedButton屬性設為@id/option_twenty_percent。
1 | <RadioGroup |
根據預設,系統會選取 20% 的小費選項!現在這開始看起來像小費計算機了!
完成版面配置的其餘部分
現在已進入版面配置的最後一個部分。請新增 Switch、Button 和 TextView 以顯示小費金額。
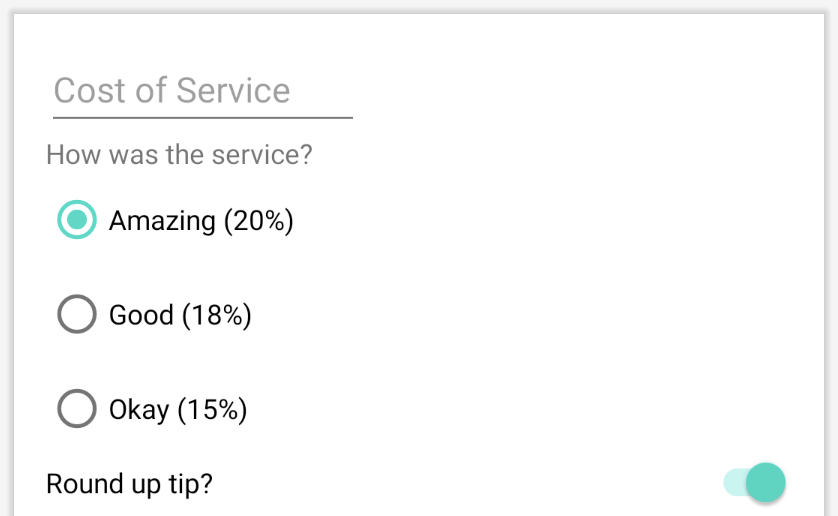
新增切換鈕,讓小費四捨五入
接下來,您將使用 Switch 小工具,讓使用者選取「Yes」或「No」是否要將小費四捨五入。
您想要 Switch 的寬度和父項一樣,因此您可能會認為寬度應該設為 match_parent。如前文所述,您無法在 ConstraintLayout 的 UI 元素上設定 match_parent。相反地,您需要限制檢視畫面的開始和結束時間,並將寬度設為 0dp。將寬度設為 0dp 可讓系統不要計算寬度,只要嘗試與檢視畫面中的限制條件相符即可。
注意:您無法在 match_parent 中使用 ConstraintLayout 的任何資料檢視。而是使用 0dp,也就是相符條件。
- 在
RadioGroup的 XML 後方加入Switch元素。 - 如上所述,將
layout_width設為0dp - 將
layout_height設為wrap_content這會將Switch觀看內容與內部內容高度一樣。 - 將
id屬性設為@+id/round_up_switch。 - 將
text屬性設為Round up tip?。這會做為Switch的標籤使用。 - 將
Switch的起始點限制為tip_options的起始邊緣,並將結尾點限制為父項的終點邊緣。 - 將
Switch的頂端限制在tip_options的底部。 - 使用
/>關閉標記。
如果切換按鈕預設為開啟,且有 android:checked 的屬性,則可能的值為 true (開啟) 或 false (關閉)。
- 將
android:checked屬性設為true
1 | <Switch |
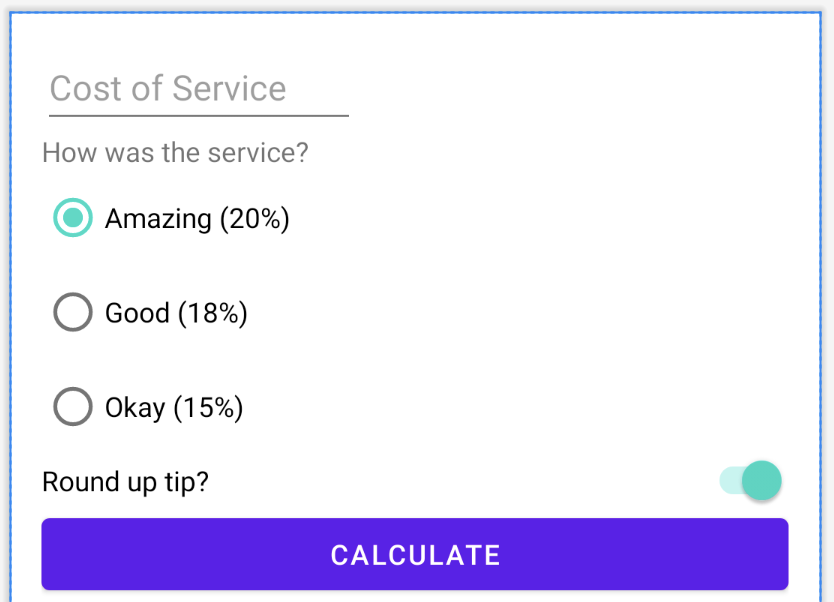
新增計算按鈕
接著,您必須新增 Button 來向使用者說明小費的計算方式。您想將按鈕設為與上層最寬,因此水平限制和寬度與 Switch 相同。
- 在
Switch後方加上Button。 - 請將寬度設為
0dp,方法與Switch相同。 - 將高度設為
wrap_content。 - 為資源 ID
@+id/calculate_button輸入文字,格式為「"Calculate"」。 - 將
Button的上方邊緣固定到Switch的底部邊緣 - 將起始邊緣限制為上層的起點,以及將結尾邊緣設為父項的終點邊緣。
- 使用
/>關閉標記。
1 | <Button |
新增小費計算結果
就快完成了版面配置!在這個步驟中,您會為小費的結果加上 TextView、將其放在「Calculate」按鈕下方,並且與結尾處對齊,而非與其他 UI 元素一樣放在開始處。
- 新增具有 ID 為
tip_result且 ID 為Tip Amount的TextView。 - 將
TextView的結尾邊緣限制在父項的終點邊緣。 - 限制「Calculate」按鈕的上方與下方的邊緣。
1 | <TextView |
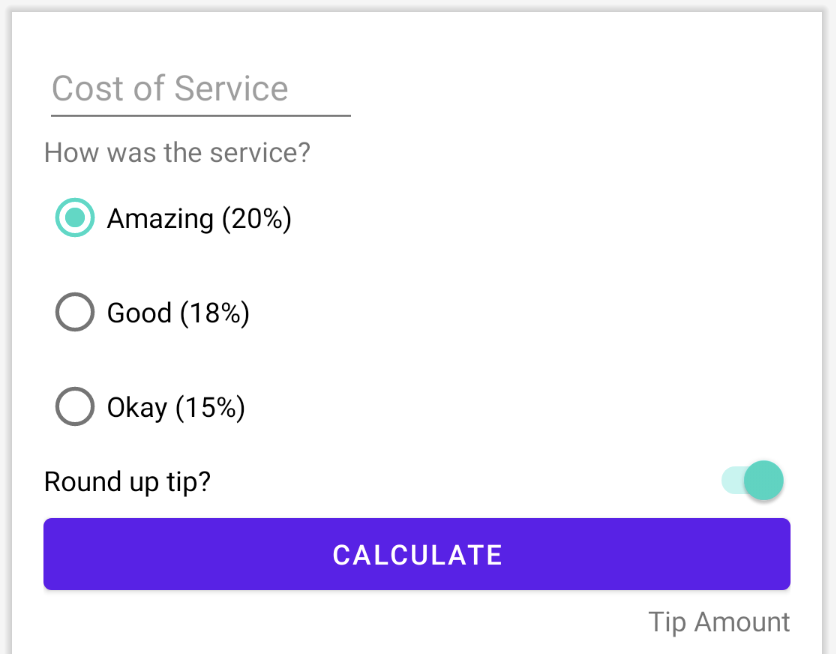
- 執行應用程式。看起來應該要像這個螢幕截圖一樣。

實際執行畫面:

採用完善程式設計做法
擷取字串
按一下字串;將滑鼠游標懸停在顯示的黃色燈泡圖示上,然後按一下旁邊的三角形圖示;選擇「Extract String Resource」。字串資源的預設名稱沒有問題。您可以視需要根據提示選擇使用
amazing_service、good_service和ok_service,讓名稱更加描述性。如果畫面上未顯示「Project」視窗,請按一下視窗左側的「Project」分頁標籤。
開啟 app > res > values > string.xml 查看所有 UI 字串資源。
1 | <resources> |
重新格式化 XML
- 在
activity_main.xml中,選擇「Edit」>「Select All」。 - 依序選擇「Code」>「Reformat Code」。
以確保縮排一致,且可能會將 UI 元素的部分 XML 重新排序,例如將單一元素的所有 android: 屬性放在一起。
總結
- XML (擴充標記語言) 可用來管理文字,由標記、元素和屬性構成。
- 使用 XML 定義 Android 應用程式的版面配置。
- 使用
EditText可讓使用者輸入內容或編輯文字。 EditText可提示用戶指定該欄位的內容。- 指定
android:inputType屬性,以限制用戶可輸入EditText欄位的文字類型。 - 列出包含
RadioButtons的獨家選項清單 (使用RadioGroup分組)。 RadioGroup可以是垂直或水平,而您也可以指定要最初選取的RadioButton。- 使用
Switch可讓用戶在兩個選項之間切換。 - 您不必使用個別的
TextView,就可以將標籤新增至Switch。 ConstraintLayout中的每個子項都必須包含垂直和水平限制條件。- 使用「start」和「end」限制條件來處理由左至右 (LTR) 和右至左 (RTL) 的語言。
- 限制屬性名稱會依照
layout_constraint<Source>_to<Target>Of的格式提供。 - 如要讓
View盡可能適用於目標ConstraintLayout,請將開頭和結尾限制為父項的開頭和結尾,然後將寬度設為0dp。