學習如何測試 Navigation 元件。
學習目標
- 如何利用
instrumentation test(設備測試)來測試 Navigation 元件。 - 如何不使用重複的程式碼設定測試。
下載本程式碼研究室的範例程式碼
在本程式碼研究室中,您將新增設備測試到 Words 應用程式的程式碼。
範例應用程式總覽
Words 應用程式的主畫面會顯示一份清單,每個清單項目都是字母表中的一個字母。按一下其中一個字母,螢幕上會顯示該字母開頭的字詞清單。
建立測試目錄
如有需要,請按照之前的程式碼研究室步驟,建立 Words 應用程式的設備測試(instrumentation test )目錄。如果您已完成這個步驟,請直接跳到「新增必要的依附元件(dependencies)」。
- 可以參考Android筆記(15)-編寫檢測設備測試這篇文章。
建立設備測試類別
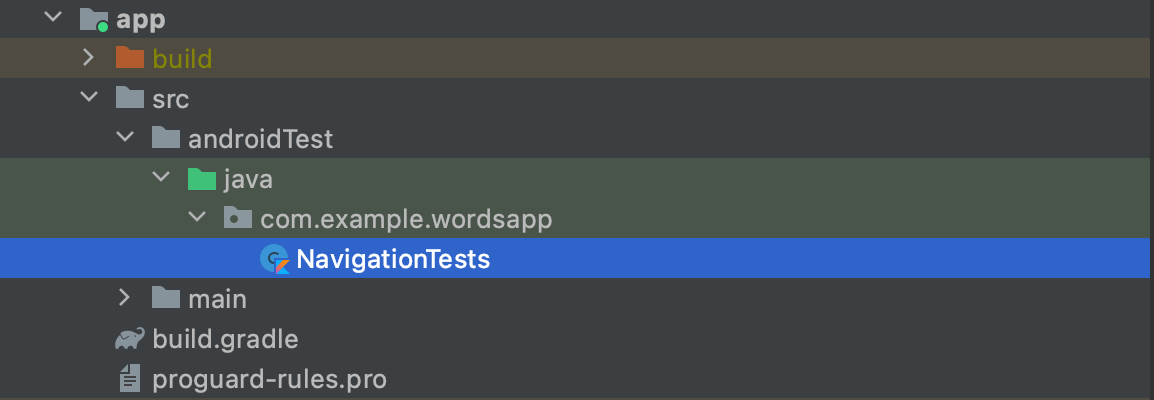
在「androidTest」資料夾中,建立名為 NavigationTests.kt 的新類別。
新增必要的 Dependencies
測試 Navigation Component 時,會需要某些特定的 Gradle dependencies。另外,我們會提供 dependencies,以特定方式測試 fragments。前往應用程式模組的「build.gradle」檔案,並新增下列 dependencies:
1 | androidTestImplementation 'androidx.test.ext:junit:1.1.3' |
撰寫 Navigation Component 測試
測試 Navigation Component 不同於測試一般 navigation。測試一般 navigation 時,我們會在裝置或模擬器上觸發 navigation 操作來執行。但測試 Navigation Component 時,我們實際上並未讓裝置/模擬器執行明顯的 navigation 操作,而是會以不實際變更裝置或模擬器上顯示的內容為前提,強制 Navigation Controller 來瀏覽,然後才確認其是否抵達正確的目的地。
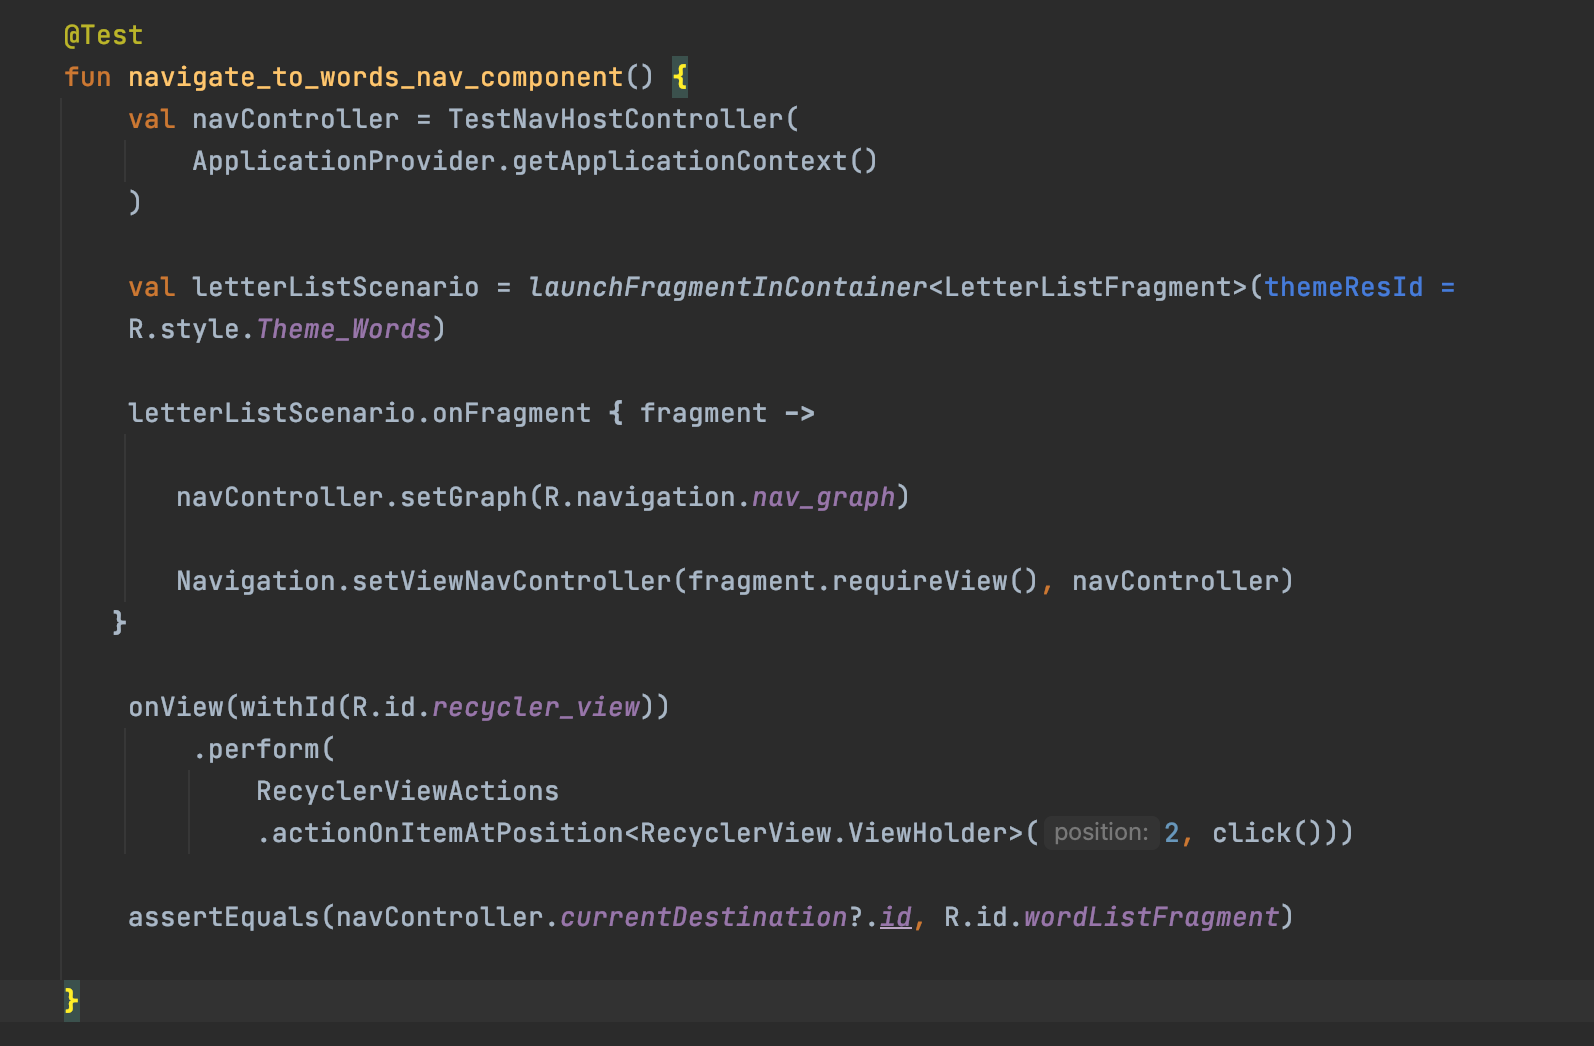
建立名為
navigate_to_words_nav_component()的測試函式。在測試中使用 Navigation Component 需要進行一些設定。請在
navigate_to_words_nav_component()方法中,建立 Navigation Controller 的測試執行個體(instance)。
1 | val navController = TestNavHostController( |
- Navigation Component 會使用 Fragment 驅動 UI。其中一個相當於
ActivityScenarioRule的 fragment,可用來隔離要測試的 fragment,所以需要 fragment 專屬的 dependencies。
- 測試需要大量導覽的fragment時,這個做法很實用,因為啟動不必額外的程式碼處理 navigation 目的地。
1 | val letterListScenario = launchFragmentInContainer<LetterListFragment>(themeResId = |
這裡會指出我們想要啟動 LetterListFragment。我們必須傳遞應用程式的主題(theme),讓 UI 元件知道要使用哪個主題(theme),否則測試可能異常終止。
- 最後,我們需要明確宣告 fragment 啟動後,Navigation Controller 要使用哪個 Navigation Graph。
1 | letterListScenario.onFragment { fragment -> |
- 接著觸發提示 navigaton 的事件。
1 | onView(withId(R.id.recycler_view)) |
使用 launchFragmentInContainer() 方法時,實際 navigation 是不可能的,因為容器不知道我們可能前往的其他 fragment 或 activity。容器只知道我們指定啟動的 fragment。因此,在裝置或模擬器上執行測試時,您不會看到實際的 navigation。或許這不符合直覺,但我們可以根據目前的目的地,做出更直接的判斷。與其尋找已知會顯示在特定畫面的 UI 元件,我們可以直接檢查目前 navigation controller 的目的地,確認是否包含預期的 fragment ID。此方法比上述做法可靠許多。
1 | assertEquals(navController.currentDestination?.id, R.id.wordListFragment) |
您的測試看起來應像這樣:
避免包含備註的重複程式碼
在 Android 中,設備測試和單元測試都有功能可以不必重複程式碼,即可設定類別中每個測試相同的設定。
假設我們使用包含 10 個按鈕的 fragment。按一下按鈕後,按鈕會導向特定的 fragment。
如果我們按照上述測試的模式,可能必須分別為這 10 次測試重複使用下列程式碼 (請注意,此程式碼只是範例,不會在本程式碼研究室使用的應用程式中編譯):
1 | val navController = TestNavHostController( |
重複 10 次的程式碼非常冗長。在這個案例中,我們可以使用 JUnit 提供的 @Before 註解來節省寶貴的時間。即在一個方法上加上註解,並於其中提供測試設定所需的程式碼。我們可以隨意命名這個方法,但名稱必須有關連性。我們不必重複設定相同的 fragment 10 次,而是按照以下範例撰寫設定程式碼:
1 | lateinit var navController: TestNavHostController |
現在,此方法會對我們在這個類別中編寫的每項測試執行,且我們可從任何一項測試存取必要的變數。
以此類推,若要每次測試後執行程式碼,也可使用 @After 註解。例如,@After 可用來清理用於測試的資源,對設備測試來說,也可用來將裝置回復至特定狀態。
JUnit 也提供 @BeforeClass 和 @AfterClass 註解。不同之處在於此註解的方法僅執行一次,但已執行的程式碼仍會套用至每個方法。如果您的設定或中止方法涉及消耗大量資源的作業,建議您改用這些註解。使用 @BeforeClass 和 @AfterClass 註解的方法必須搭配 @JvmStatic 註解,放在 companion object 中。若要示範這些註解的執行順序,請參考下列程式碼:
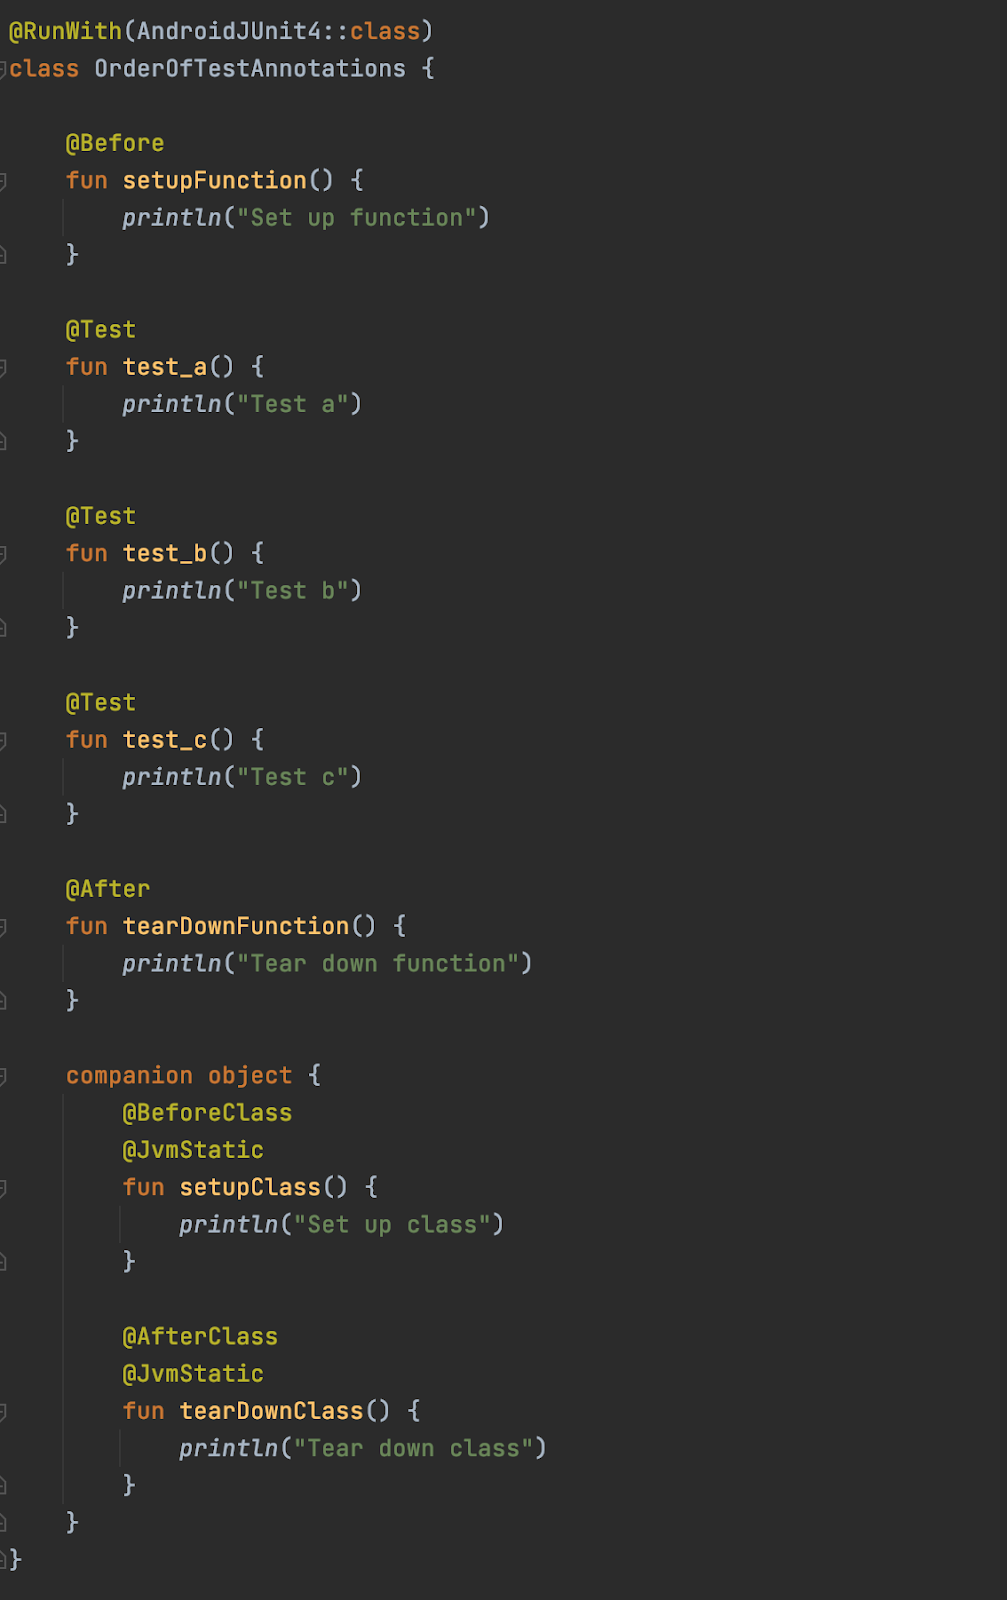
請記得,@BeforeClass 會針對類別執行,@Before 會在函式執行前執行,@After 會在函式執行後執行,@AfterClass 也會針對類別執行。您能預測以下內容的輸出結果嗎?
函式的執行順序為 setupClass()、setupFunction()、test_a()、tearDownFunction()、setupFunction()、test_b()、tearDownFunction()、setupFunction()、test_c()、tearDownFunction()、tearDownClass()。這個執行順序很合理,因為 @Before 和 @After 會分別在每個方法前後執行。@BeforeClass 會在類別中的任何項目執行前執行一次,@AfterClass 則在類別的所有其他項目執行後執行一次。
總結
- 學習測試 Navigation Component 的方法。
- 瞭解如何使用
@Before、@BeforeClass、@After和@AfterClass註解,避免重複的程式碼。