瞭解如何使用
WorkManager編寫 simple work,然後執行設有限制條件(constraints)的複雜鏈結(chaining) work。
建構項目
使用 Blur-O-Matic,該 app 可對照片進行模糊處理,並將處理後的照片保存在檔案中。

學習目標
- 將
WorkManager添加到您的 project 中 - 安排(scheduling) 一個 simple task
- Input 和 output 參數
- 鏈結(chaining) work
- 唯一(unique) work
- 在 UI 中顯示 work status
- 取消(cancel) work
- work 限制條件(constraints)
WorkManager 簡介
Android 有多個選項用於處理可延遲的後台工作。此 Codelab 中介紹的 WorkManager 是一種具有向後兼容性(backwards compatible)且簡單靈活的 library,用於處理可延遲的後台工作(background work)。WorkManager 是 Android 平台上推薦用於處理可延遲工作(deferrable work)的 task scheduler,能夠保證工作得到執行。
什麽是 WorkManager
WorkManager 屬於 Android Jetpack 的一部分,是一種Architecture Component,用於處理既需要機會性執行,又需要有保證的執行的後台工作。機會性執行(Opportunistic execution)意味著 WorkManager 會盡快執行您的後台工作。有保證的執行(Guaranteed execution)意味著 WorkManager 會負責通過邏輯保障在各種情況下啟動您的工作,即使使用者離開您的 app 也無妨。
WorkManager 是一個極其靈活的 library,具有許多其他優勢。這其中包括:
- 支援非同步(asynchronous)一次性(one-off)任務和週期性(periodic)任務
- 支持 network conditions、儲存空間和充電狀態等限制(constraints)條件
- 鏈接複雜的 work requests,包括並行(parallel) 運行 work
- 將來自一個 work requests 的 output 用作下一個 work requests 的 input
- 處理到 API 等級的兼容性,可向後兼容至 API 等級 14
- 無論是否使用 Google Play services 都可以運行
- 遵循系統健康最佳做法
- 提供
LiveData支持,可在 UI 中輕鬆顯示 work request state
注意:WorkManager 依賴於幾個 API,例如 JobScheduler 和 AlarmManager。WorkManager 會根據使用者裝置 API 級別等條件選擇使用適合的 API。如需了解詳情,請查看 WorkManager 文件。
何時使用 WorkManager
有些任務,即便使用者離開特定螢幕或您的 app,也需要完成。對於這些任務(tasks),WorkManager library 是不錯的選擇。
以下是一些適合使用 WorkManager 的任務(tasks)的典型範例:
- 上傳(Uploading) logs
- 對 image 套用濾鏡(filters)並儲存 image
- 定期將 local data 與 network 同步
WorkManager 提供有保證的執行,然而並非所有任務都需要這種保證。因此,它並非運行所有非 main thread 任務(task)的萬全之選。如需詳細了解何時使用 WorkManager,請參閱Background 處理指南。
準備工作
第 1 步 - 下載程式碼
從 GitHub clone WorkManager Codelab:
1 | git clone -b start_kotlin https://github.com/googlecodelabs/android-workmanager |
第 2 步 - 執行 app
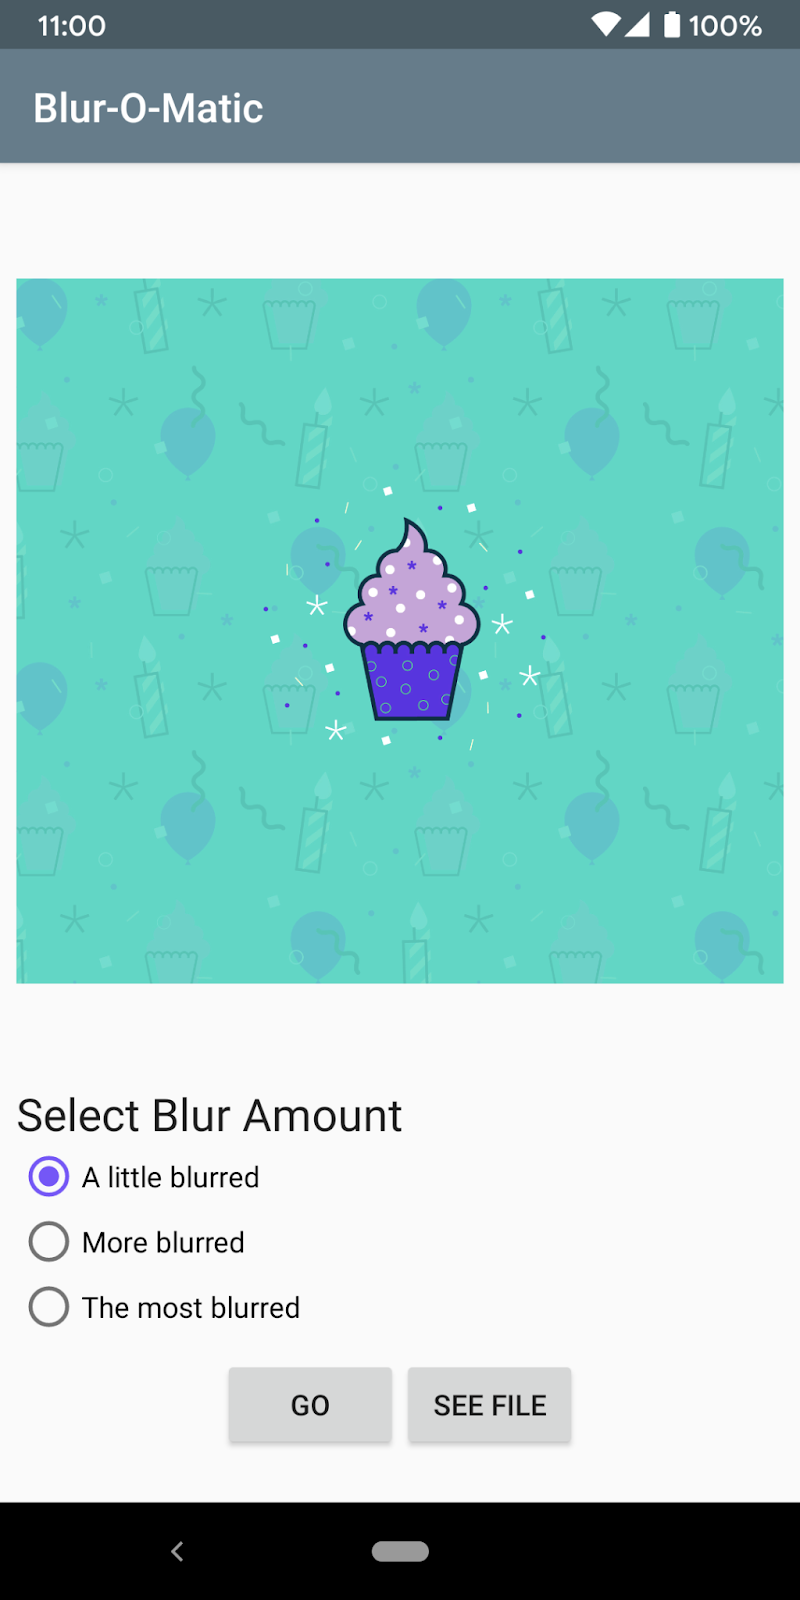
執行 app,您應該會看到下方的畫面。

螢幕上應該會顯示一些 radio buttons,您可以通過這些 button 選擇要對圖片進行什麽程度的模糊處理。按 Go button 即可對圖片進行模糊處理並保存。
截至目前,此 app 不會應用任何模糊處理。
起始程式碼包含以下內容:
WorkerUtils:這個 class 包含對圖片實際進行模糊處理所需的程式碼,並包含之後您會用於顯示Notifications、將 bitmap 保存到檔案以及減慢 app 運行速度的一些便捷方法。BlurActivity:* 此activity用於顯示圖片以及添加用於選擇模糊程度的 radio buttons。BlurViewModel:*此 view model 用於儲存顯示BlurActivity所需的所有資料,也將是您使用WorkManager啟動後台工作(background work)的 class。Constants:一個靜態(static) class,其中包含您在學習此 Codelab 期間會用到的一些常數(constants)。res/activity_blur.xml:BlurActivity的 layout 檔案。
您將僅在這些檔案中編寫程式碼。
將 WorkManager 添加到 app
WorkManager 需要使用以下 Gradle dependency,這些 dependency 已包含在 build 檔案中:
app/build.gradle
1 | dependencies { |
- 您應該在此處獲取最新穩定版
work-runtime-ktx,並部署正確的版本。
目前,最新版本為:
1 | versions.work = "2.7.1" |
創建 WorkRequest
在此步驟中,您將接受 res/drawable 資料夾中一張名為 android_cupcake.png 的圖片,並在後台(background)對這張圖片運行一些函數。這些函數會對圖片進行模糊處理,然後將圖片保存到暫存檔案中。
WorkManager 基礎知識
您需要了解以下幾個 WorkManager class:
Worker:此位置用於放置您希望在後台(background)執行的實際工作的程式碼。您需要繼承此 class 並替換doWork()方法。WorkRequest:此 class 表示請求(request)執行某些工作。您將在創建WorkRequest的過程中傳入Worker。在創建WorkRequest時,您還可以指定Constraints等內容,例如運行Worker的時間。WorkManager:這個 class 實質上可以安排(schedules)您的WorkRequest並使其運行。它以分散系統資源(system resources)負載(load)的方式安排(schedules)WorkRequest,同時遵守您指定的限制條件(constraints)。
在這種情況下,您將定義新的 BlurWorker,其中包含用於對圖片進行模糊處理的程式碼。點擊 Go button 時,系統會創建一個 WorkRequest,然後通過 WorkManager 將其加入隊列(enqueued)。
第 1 步 - 創建 BlurWorker
在 workers package 中,新建一個名為 BlurWorker 的 Kotlin class。
第 2 步 - 新增 constructor
向 BlurWorker class 新增對 Worker 的 dependency:
1 | class BlurWorker(ctx: Context, params: WorkerParameters) : Worker(ctx, params) { |
第 3 步 - 覆寫並實作 doWork()
Worker 會對所顯示的 cupcake image 進行模糊處理。
為了更好地了解何時執行工作,您將使用 WorkerUtil 的 makeStatusNotification()。使用此方法,您可以輕松地在螢幕頂部顯示 notification banner。
替換 doWork() 方法,然後執行以下操作。您可以參考本部分末尾完成後的程式碼:
- 通過呼叫
applicationContext屬性獲取Context。將其分配給名為appContext的新val。您接下來要執行的各種 bitmap 處理需要用到此參數。
1 | val appContext = applicationContext |
- 使用函數
makeStatusNotification顯示狀態通知(status notification),以向使用者發送有關對圖片進行模糊處理的通知(notify)。
1 | makeStatusNotification("Blurring image", appContext) |
- 利用 cupcake image 創建一個
Bitmap:
1 | val picture = BitmapFactory.decodeResource( |
- 通過從
WorkerUtils呼叫blurBitmap方法,獲取此 bitmap 模糊處理後的版本。
1 | val output = blurBitmap(picture, appContext) |
- 從
WorkerUtils呼叫writeBitmapToFile方法,將該 bitmap 寫入暫存檔案。請務必將 return 的 URI 保存到 local variable。
1 | val outputUri = writeBitmapToFile(appContext, output) |
- 從
WorkerUtils呼叫makeStatusNotification方法,以創建顯示 URI 的通知(notification)。
1 | makeStatusNotification("Output is $outputUri", appContext) |
- Return
Result.success()。
1 | Result.success() |
- 將步驟 3-6 中的程式碼包裝在
try/catchstatement 中。Catch 一個通用的(generic)Throwable。
1 | return try { |
- 在
catchstatement 中,使用 Log statementLog.e(TAG, "Error applying blur")輸出error message 。
1 | Log.e(TAG, "Error applying blur") |
- 然後在
catchstatement 中 returnResult.failure()。
1 | Result.failure() |
此步驟的完整程式碼如下所示。
BlurWorker.kt
1 | package com.example.background.workers |
第 4 步 - 在 ViewModel 中獲取 WorkManager
在 ViewModel 中為 WorkManager instance 創建 class variable:
BlurViewModel.kt
1 | private val workManager = WorkManager.getInstance(application) |
第 5 步 - 在 WorkManager 中將 WorkRequest 加入 enqueue
好吧,是時候發出 WorkRequest 並告訴 WorkManager 要運行它了。
WorkRequest 有兩種類型(types):
OneTimeWorkRequest:只會執行一次的WorkRequest。PeriodicWorkRequest:按周期(循環)重覆執行的WorkRequest。
我們只希望在點擊 Go button 後對圖片進行模糊處理(blurred)。當使使用者點擊 Go button 時,系統會呼叫 applyBlur 方法,因此請通過 BlurWorker 創建 OneTimeWorkRequest。然後,使用 WorkManager instance 將您的 WorkRequest 加入隊列(enqueue)。
將以下程式碼行添加到 BlurViewModel 的 applyBlur() 方法中:
BlurViewModel.kt
1 | internal fun applyBlur(blurLevel: Int) { |
第 6 步 - 運行您的程式碼!
運行您的程式碼。此程式碼應進行編譯,並且在按下 Go button 時,您應該會看到通知(Notification)。請注意,如需查看更模糊的照片,您應該選擇 “More blurred”(更模糊)或 “The most blurred”(最模糊)選項。

如需確認圖片是否已成功模糊,您可以在 Android Studio 中打開 Device File Explorer:

然後依次轉到 data > data > com.example.background > files > Blathfilterfilter_outputs > <URI>,並確認 cupcake 確實已經模糊:

新增 input 和 output
對資源目錄中的圖片資源進行模糊處理固然不錯,但如果想讓 O-M-Matic 真正成為一款革命性的圖片編輯應用,您應該讓使用者模糊處理他們在螢幕上看到的圖片,然後向他們展示經過模糊處理的照片。
為實現此目標,我們將提供作為 input 顯示在 WorkRequest 中的紙杯蛋糕圖片的 URI,然後使用 WorkRequest 的 output 顯示最終的經過模糊處理的圖片。
第 1 步 - 創建資料 input object
Input 和 output 通過 Data object 傳入和傳出。Data object 是輕量化的 key-value 組合 containers。它們用於儲存少量可從 WorkRequest 傳入和傳出的資料。
您需要將使用者圖片的 URI 傳入捆綁包中。該 URI 儲存在名為 imageUri 的 variable 中。
在 BlurViewModel 中,創建一個名為 createInputDataForUri 的 private 方法。該方法應執行以下操作:
- 創建一個
Data.Builderobject。在收到 request 時,importandroidx.work.Data。
1 | val builder = Data.Builder() |
- 如果
imageUri是非 nullURI,則使用putString方法將其添加到Dataobject。該方法可獲取一個 key 和一個 value。您可以使用Constantsclass 中的StringconstantKEY_IMAGE_URI。
1 | imageUri?.let { |
- 對
Data.Builderobject 呼叫build()以創建Dataobject 並 return。
1 | return builder.build() |
下面是完整的 createInputDataForUri 方法:
BlurViewModel.kt
1 | /** |
第 2 步 - 將 Data object 傳遞到 WorkRequest
您將更改 BlurViewModel 中的 applyBlur 方法,以便:
- 創建新的
OneTimeWorkRequestBuilder。
1 | val blurRequest = OneTimeWorkRequestBuilder<BlurWorker>() |
- 呼叫
setInputData,傳入createInputDataForUri的結果。
1 | .setInputData(createInputDataForUri()) |
- build
OneTimeWorkRequest。
1 | .build() |
- 使用
WorkManager將 work request 加入隊列(enqueues),以便系統將可以按照預期運行工作(scheduled to run)。
1 | workManager.enqueue(blurRequest) |
下面是完整的 applyBlur 方法:
BlurViewModel.kt
1 | internal fun applyBlur(blurLevel: Int) { |
第 3 步 - 更新 BlurWorker 的 doWork() 以獲取 input
現在,請更新 BlurWorker 的 doWork() 方法,以獲取從 Data object 傳入的 URI:
BlurWorker.kt
1 | override fun doWork(): Result { |
第 4 步 - 對給定的 URI 進行模糊處理
有了此 URI,我們現在對螢幕上的 cupcake image 進行模糊處理(blur)。
- 移除之前用於獲取圖片資源的程式碼。
1 | val picture = BitmapFactory.decodeResource(appContext.resources, R.drawable.android_cupcake) |
- 檢查從傳入的
Data中獲取的resourceUri不為空(empty)。
1 | if (TextUtils.isEmpty(resourceUri)) { |
- 將
picturevariable 指派(assign)給傳入的圖片,如下所示:
1 | val resolver = appContext.contentResolver |
1 | val picture = BitmapFactory.decodeStream( |
BlurWorker.kt
1 | override fun doWork(): Result { |
第 5 步 - Output temporary URI
此 Worker 的工作已完成,您可以在 Result.success() 中 return output URI。提供 Output URI 作為 output Data,使其他 Worker 可以輕鬆存取這張臨時圖片,以執行進一步操作。
在下一章中,您將創建工作鏈(Chain of workers),屆時此操作將非常有幫助。具體操作步驟如下:
- 像對 input 進行的操作一樣,創建新的
Data,並將outputUri儲存為String。使用相同的 key,即KEY_IMAGE_URI。
1 | val outputData = workDataOf(KEY_IMAGE_URI to outputUri.toString()) |
- 使用
Result.success(Data outputData)方法將它 return 給WorkManager。
1 | Result.success(outputData) |
BlurWorker.kt
將 doWork() 中的 Result.success() 行修改為:
1 | val outputData = workDataOf(KEY_IMAGE_URI to outputUri.toString()) |
第 6 步 - 執行您的 app
此時,您應該執行 app。它應會編譯並具有相同的行為,您可以透過 Device File Explorer 看到模糊的圖片,但尚未在螢幕上看到。
如需檢查是否存在其他經過模糊處理的圖片,您可以在 Android Studio 中打開 Device File Explorer,然後轉到 data/data/com.example.background/files/blur_filter_outputs/<URI>,就像上一步的操作一樣。
請注意,您可能需要點擊 Synchronize(同步)才能查看圖片:

太棒了!您已使用 WorkManager 對 input image 進行模糊處理!
鏈結您的工作(Chain your work)
現在,您將執行一項 work task:對圖片進行模糊處理。這是非常不錯的第一步,但缺少一些核心功能:
- 此操作不會清理暫存檔案(temporary files)。
- 實際上,它不會將圖片保存到永久性檔案(permanent file)中。
- 始終對圖片做相同程度的模糊處理(blurs)。
我們將使用WorkManager工作鏈添加此功能。
WorkManager 允許您創建按順序(in order)執行或並行(parallel)執行的單獨(separate) WorkerRequest。在此步驟中,您將創建一個如下所示的工作鏈(chain of work):

WorkRequest 表示為方框。
鏈接(chaining)的另一個簡潔功能是,一個 WorkRequest 的 output 會成為鏈(chain)中下一個 WorkRequest 的 input。在每個 WorkRequest 之間傳遞的 input 和 output 均顯示為 blue text。
第 1 步 - 創建 Cleanup 和 Save Workers
首先,您需要定義所需的所有 Worker class。您已經有了用於對圖片進行模糊處理的 Worker,但還需要用於清理暫存檔案(temp files)的 Worker 以及用於永久保存圖片的 Worker。
請在 workers package 中創建兩個繼承 Worker 的新 class。
第一個 class 的名稱應為 CleanupWorker,第二個 class 的名稱應為 SaveImageToFileWorker。
第 2 步 - 繼承 Worker
從 Worker class 繼承 CleanupWorker class。添加所需的 constructor 參數。
1 | class CleanupWorker(ctx: Context, params: WorkerParameters) : Worker(ctx, params) { |
第 3 步 - 覆寫和實作 doWork() 以用於 CleanupWorker
CleanupWorker 不需要獲取任何 input 或傳遞任何 ouput。它只是刪除暫存檔案(temporary files)(如果存在)。由於檔案操作不在本 Codelab 的範圍之內,因此您可以複製 CleanupWorker 的程式碼,如下所示:
CleanupWorker.kt
1 | package com.example.background.workers |
第 4 步 - 覆寫和實作 doWork() 以用於 SaveImageToFileWorker
SaveImageToFileWorker 將獲取 input 和 output。Input 是使用 key KEY_IMAGE_URI 儲存的 String,即暫時模糊處理的圖片 URI(temporarily blurred image URI),而 output 也將是使用 key KEY_IMAGE_URI 儲存的 String,即保存的模糊處理圖片的 URI(saved blurred image stored URI)。

此 Codelab 不涉及檔案處理,因此我們在下面提供了程式碼。請注意,系統會使用 key KEY_IMAGE_URI 檢索 resourceUri 和 output 值。該程式碼與您在最後一步中為 input 和 output 編寫的程式碼非常相似(它使用了全部相同的 key)。
SaveImageToFileWorker.kt
1 | package com.example.background.workers |
第 5 步 - 修改 BlurWorker Notification
現在,我們有了用於將圖片保存到正確資料夾的 Worker 鏈(chain),我們可以使用 WorkerUtils class 中定義的 sleep() 方法減慢工作(work)速度,以便更輕松地做到查看每個 WorkRequest 的啟動情況,即使在模擬器上也不例外。BlurWorker 的最終版本如下所示:
BlurWorker.kt
1 | class BlurWorker(ctx: Context, params: WorkerParameters) : Worker(ctx, params) { |
第 6 步 - 創建 WorkRequest 鏈(chain)
您需要修改 BlurViewModel 的 applyBlur 方法以執行 WorkRequest 鏈,而不是僅執行一個請求。目前,程式碼如下所示:
BlurViewModel.kt
1 | val blurRequest = OneTimeWorkRequestBuilder<BlurWorker>() |
呼叫 workManager.beginWith(),而不是呼叫 workManager.enqueue()。此呼叫會 return WorkContinuation,其定義了 WorkRequest 鏈(chain)。您可以通過呼叫 then() 方法向此工作請求鏈(chain of work requests)中添加 request object。例如,如果您擁有三個 WorkRequest objects,即 workA、workB 和 workC,則可以編寫以下程式碼:
1 | // Example code, don't copy to the project |
此程式碼將生成並運行以下 WorkRequest 鏈(chain):

在 applyBlur 中創建一個 CleanupWorker WorkRequest、BlurImage WorkRequest 和 SaveImageToFile WorkRequest 鏈(chain)。將 input 傳遞到 BlurImage WorkRequest 中。
此操作的程式碼如下:BlurViewModel.kt
1 | internal fun applyBlur(blurLevel: Int) { |
此程式碼應該編譯和執行。現在,您應該可以點擊 Go button,並可以在不同 workers 執行時看到通知(notifications)。您仍然可以在 Device File Explorer 中查看經過模糊處理的圖片,在下一步中,您將再添加一個 button,以便使用者可以在裝置上查看經過模糊處理的圖片。
在下面的屏幕截圖中,您會發現 notification messages 中顯示當前正在執行的 workers。


第 7 步 - 重覆使用 BlurWorker
現在,我們需要添加對圖片進行不同程度的模糊處理的功能。請獲取傳遞到 applyBlur 中的 blurLevel 參數,並向鏈(chain)中添加多個模糊處理 WorkRequest 操作。只有第一個 WorkRequest 需要且應該獲取 URI input。
請注意,這是為了學習目的而在一定程度上刻意進行的設置。相比之下,呼叫模糊處理程式碼三次效率不如通過 BlurWorker 來獲取控制模糊處理 level 的 input。不過使用該方法時,我們可以展示 WorkManager 鏈接(chaining)的靈活性。
您可以親自嘗試,然後與以下程式碼進行比較:BlurViewModel.kt
1 | internal fun applyBlur(blurLevel: Int) { |
打開裝置 Device File Explorer,查看經過模糊處理的圖片。請注意,output 資料夾中包含多張模糊處理過的圖片(blurred images)、處於模糊處理中間階段的圖片,以及根據您選擇的模糊處理程度顯示經過模糊處理的最終圖片。
您的 “Work” 非常不錯!現在,您可以對圖片進行模糊處理,模糊程度多少完全由您掌控。處理後的圖片非常有神秘感。
確保 Work 不重複
現在,您已學會使用鏈(chains),接下來應該掌握的是 WorkManager 的另一項強大功能 - 唯一工作鏈( unique work chains)。
有時,您一次只希望運行一個工作鏈(chain of work)。例如,您可能有一個可將 local data 與 server 同步(syncs)的工作鏈 - 您可能希望先讓第一批 data 結束同步,然後再開始新的同步。為此,請使用 beginUniqueWork 而非 beginWith;並且要提供唯一的 String 名稱。這會命名整個(entire)工作請求鏈(chain of work requests),以便您一起引用(refer)和查詢(query)這些請求。
請使用 beginUniqueWork 確保對檔案(file)進行模糊處理的工作鏈是唯一的。傳入 IMAGE_MANIPULATION_WORK_NAME 作為 key。您還需要傳入 ExistingWorkPolicy。選項包括 REPLACE、KEEP 或 APPEND。
您將使用 REPLACE,因為如果使用者在當前圖片完成之前決定對另一張圖片進行模糊處理,我們需要停止當前圖片並開始對新圖片進行模糊處理。
用於啟動唯一工作(unique work)延續的程式碼如下:BlurViewModel.kt
1 | // REPLACE THIS CODE: |
現在,Blur-O-Matic 一次只會對一張圖片進行模糊處理。
Tag 和顯示 Work status
本部分大量使用了 LiveData,因此,如果要充分了解您自己的情況,您應該熟悉如何使用 LiveData。LiveData 是一種具有生命周期感知(lifecycle-aware)能力的 data holder。
如果這是您首次使用 LiveData 或 Observable,您可以查看 Android Lifecycle-aware components Codelab 。
您要做的下一項重大更改是在執行 Work 時實際更改 app 中顯示的內容。
您可以通過獲取保留 WorkInfo object 的 LiveData 來獲取任何 WorkRequest 的狀態(status)。WorkInfo 是一個包含 WorkRequest 當前狀態(current state)詳細資料(details)的 object,其中包括:
- Work 是否為
BLOCKED、CANCELLED、ENQUEUED、FAILED、RUNNING或SUCCEEDED。 - 如果
WorkRequest完成,則為 Work 的任何 output data。
下表顯示了獲取 LiveData<WorkInfo> 或 LiveData<List<WorkInfo>> object 的三種不同方法,以及每種方法相應的用途。
| Type | WorkManager Method | Description |
|---|---|---|
| 使用 id get work | getWorkInfoByIdLiveData | 每個 WorkRequest 都有一個由 WorkManager 生成的 unique ID;您可以用此 ID 獲取適用於該實際 WorkRequest 的單個(single) LiveData。 |
| 使用 unique chain name get work | getWorkInfosForUniqueWorkLiveData | 如您所見,WorkRequest 可能是唯一鏈(unique chain)的一部分。這會在 WorkRequests 的 single, unique chain 中為所有 work return LiveData。 |
| 使用 tag get work | getWorkInfosByTagLiveData | 最後,您可以選擇使用 String tag 任何 WorkRequest。您可以使用同一 tag 標記多個 WorkRequest,並將它們關聯起來。這樣會 return 用於任何 single tag 的 LiveData。 |
您將 tagging SaveImageToFileWorker WorkRequest,以便您可以使用 getWorkInfosByTag 獲取該 tag。您將使用一個 tag 為您的 work 加上 label,而不是使用 WorkManager ID。因為如果您的使用者對多張圖片進行模糊處理,則所有保存的圖片 WorkRequest 將具有相同的 tag,而不是相同的 ID。此外,您也可以挑選 tag。
請不要使用 getWorkInfosForUniqueWork,因為它將為所有模糊處理 WorkRequest 和清理(cleanup) WorkRequest return WorkInfo,還需要額外的邏輯來查找保存的圖片 WorkRequest。
第 1 步 - Tag your work
在 applyBlur 中,在創建 SaveImageToFileWorker 時,請使用 String 常量 TAG_OUTPUT tag 您的 work:
BlurViewModel.kt
1 | val save = OneTimeWorkRequestBuilder<SaveImageToFileWorker>() |
第 2 步 - Get the WorkInfo
現在您已經 tag 了 work,可以獲取(get) WorkInfo:
- 在
BlurViewModel中,宣告一個名為outputWorkInfos的新 class variable,該 variable 是LiveData<List<WorkInfo>> - 在
BlurViewModel中添加initblock 以使用WorkManager.getWorkInfosByTagLiveData獲取(get)WorkInfo
您需要的程式碼如下:BlurViewModel.kt
1 | // New instance variable for the WorkInfo |
第 3 步 - 顯示 WorkInfo
現在您已擁有適用於 WorkInfo 的 LiveData,可以在 BlurActivity 中進行觀察(observe)。在 observer 中:
- 檢查
WorkInfolist 是否不為null並且其中是否包含任何WorkInfoobject。如果尚未點擊 Go button,則 return。 - 獲取(get) list 中的第一個
WorkInfo;只有一個 tag 為TAG_OUTPUT的WorkInfo,因為我們的工作鏈(chain of work)是唯一的(unique)。 - 使用
workInfo.state.isFinished檢查 work status 是否為已完成(finished)。 - 如果未完成,請呼叫
showWorkInProgress()以隱藏 Go button 並顯示 Cancel Work button 和進度條(progress bar)。 - 如果已完成,請調用
showWorkFinished()以隱藏 Cancel Work button 和進度條(progress bar),並顯示 Go button。
程式碼如下:BlurActivity.kt
1 | override fun onCreate(savedInstanceState: Bundle?) { |
- import
androidx.lifecycle.Observer。
第 4 步 - 執行您的 app
執行您的 app - 它應該編譯並運行,且現在可以在工作時顯示進度條(progress bar)以及 cancel button:

顯示 final output
每個 WorkInfo 還有一個 getOutputData 方法,該方法可讓您獲取(get)包含最終保存的圖片(final saved image)的 output Data object。在 Kotlin 中,您可以使用該語言為您生成的 variable outputData 存取此方法。每當有經過模糊處理的圖片準備就緒可供顯示時,便在螢幕上顯示 See File button。
第 1 步 - 創建 See File button
activity_blur.xml layout 中有一個隱藏的 button。它位於 BlurActivity 中,名為 outputButton。
在 BlurActivity 的 onCreate() 中,為該 button 設置 click listener。此操作應獲取(get) URI,然後打開一個 activity 以查看該 URI。您可以使用以下程式碼:
BlurActivity.kt
1 | override fun onCreate(savedInstanceState: Bundle?) { |
第 2 步 - 設置 URI 並顯示 button
您需要對 WorkInfo observer 應用一些最後的調整,才能達到預期效果:
- 如果
WorkInfo完成,請使用workInfo.outputData獲取(get) output data。 - 然後獲取(get) output URI,請記住,它是使用
Constants.KEY_IMAGE_URIkey 儲存的。 - 如果 URI 不為空(empty),則會正確儲存(saved);系統會顯示
outputButton並使用該 URI 對 view model 呼叫setOutputUri。
BlurActivity.kt
1 | private fun workInfosObserver(): Observer<List<WorkInfo>> { |
第 3 步 - 執行您的程式碼
執行您的程式碼。您應該會看到新的可點擊(clickable)的 See File button,該 button 會將您轉到 outputted file:


取消 work
您已新增此 cancel work button,所以我們要新增一些程式碼來執行操作。借助 WorkManager,您可以使用 ID、依照 tag 和 unique chain name 取消 work。
在這種情況下,您需要依照 unique chain name 取消 work,因為您想要取消 chain 中的所有 work,而不僅僅是某個特定步驟。
第 1 步 - 依照 name 取消 work
在 BlurViewModel 中,新增一個名為 cancelWork() 的新方法以取消唯一工作(unique work)。在函數內,對 workManager 呼叫 cancelUniqueWork,並傳入 IMAGE_MANIPULATION_WORK_NAME tag。
BlurViewModel.kt
1 | internal fun cancelWork() { |
第 2 步 - 呼叫 cancel 方法
然後,使用 cancelButton button 呼叫 cancelWork:
BlurActivity.kt
1 | // In onCreate() |
第 3 步 - 執行和取消 work
運行您的 app。它應該可以正常編譯。先對圖片進行模糊處理,然後點擊 cancel button。整個鏈(chain)都會被取消!

請注意,由於 WorkState 不再處於 FINISHED(已完成) 狀態,因此 work 取消後,只有 GO button。
Work constraints
最後,很重要的一點是,WorkManager 支持 Constraints。對於 Blur-O-Matic,您將使用裝置必須充電(charging)的限制條件(constraints)。也就是說,您的 work request 只會在裝置充電(charging)的情況下運行。
第 1 步 - 創建並添加充電限制條件
如需創建 Constraints object,請使用 Constraints.Builder。然後,您可以設置所需的,限制條件(constraints),並使用方法 setRequiresCharging() 將其添加到 WorkRequest:
BlurViewModel.kt
1 | // Put this inside the applyBlur() function, above the save work request. |
- import
androidx.work.Constraints
第 2 步 - 使用模擬器或裝置進行測試
現在您就可以執行 Blur-O-Matic 了。如果您使用的是一台裝置,則可以移除或插入您的裝置。在模擬器上,您可以在 Extended controls window 中更改充電狀態:

當裝置不充電時,應會暫停執行 SaveImageToFileWorker,直到您將裝置插入充電。

重要:添加到 Blur-O-Matic 的另一個良好限制條件(constraint)是保存時的(saving) setRequiresStorageNotLow constraint。如需查看 constraint options 的完整列表,請參閱 Constraints.Builder reference。
最終程式碼
可以從 GitHub clone 已完成的 WorkManager 的 Codelab:
1 | git clone https://github.com/googlecodelabs/android-workmanager |